#Mashup – Rainier Scarf

The Yarn

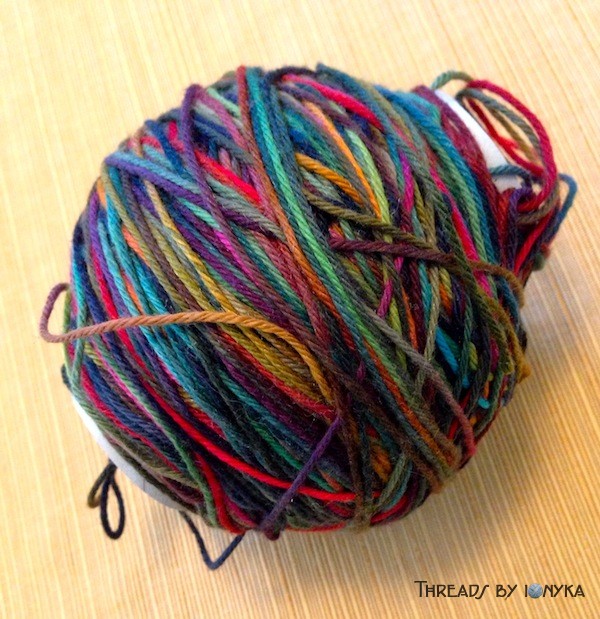
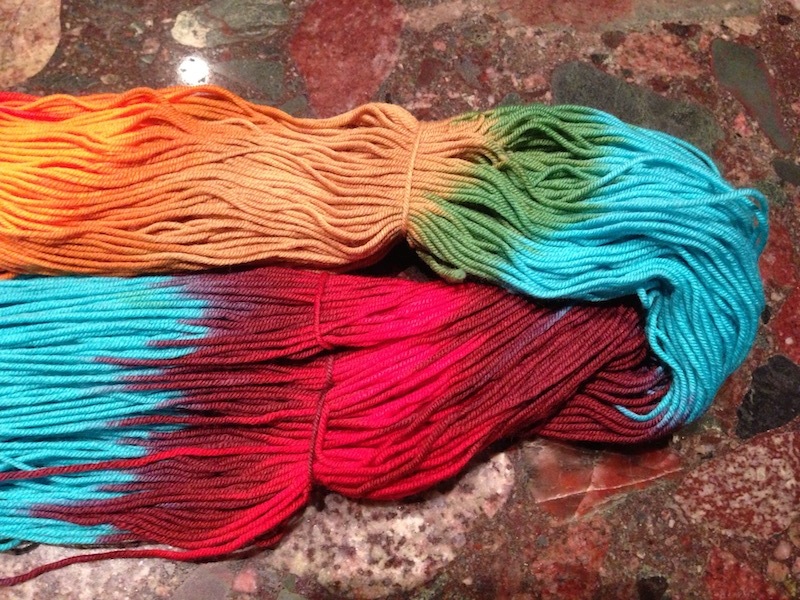
Company/Store: Cascade Yarns Pure Alpaca
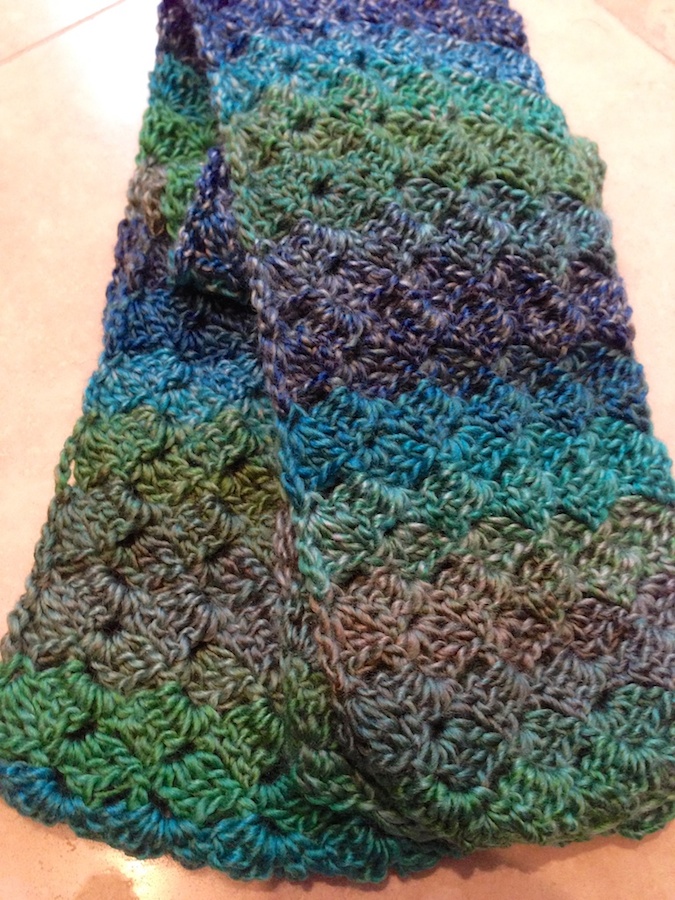
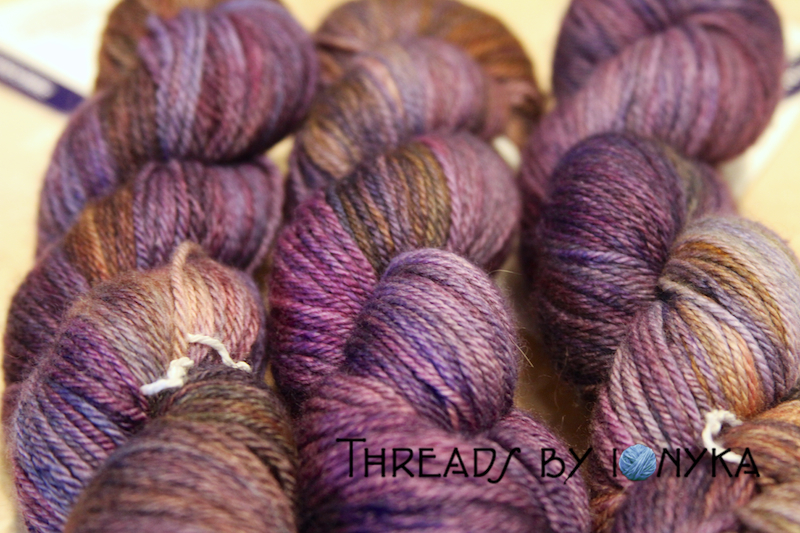
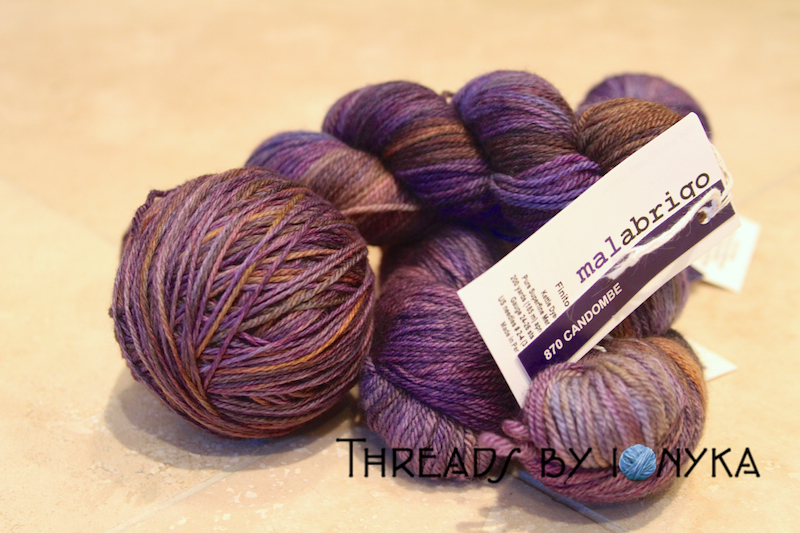
Colorway: 3014 – Rainier Heather
Weight/Length: Worsted Weight/220 yards x 2 skeins
Material: 100% Baby Alpaca

IMG_6084

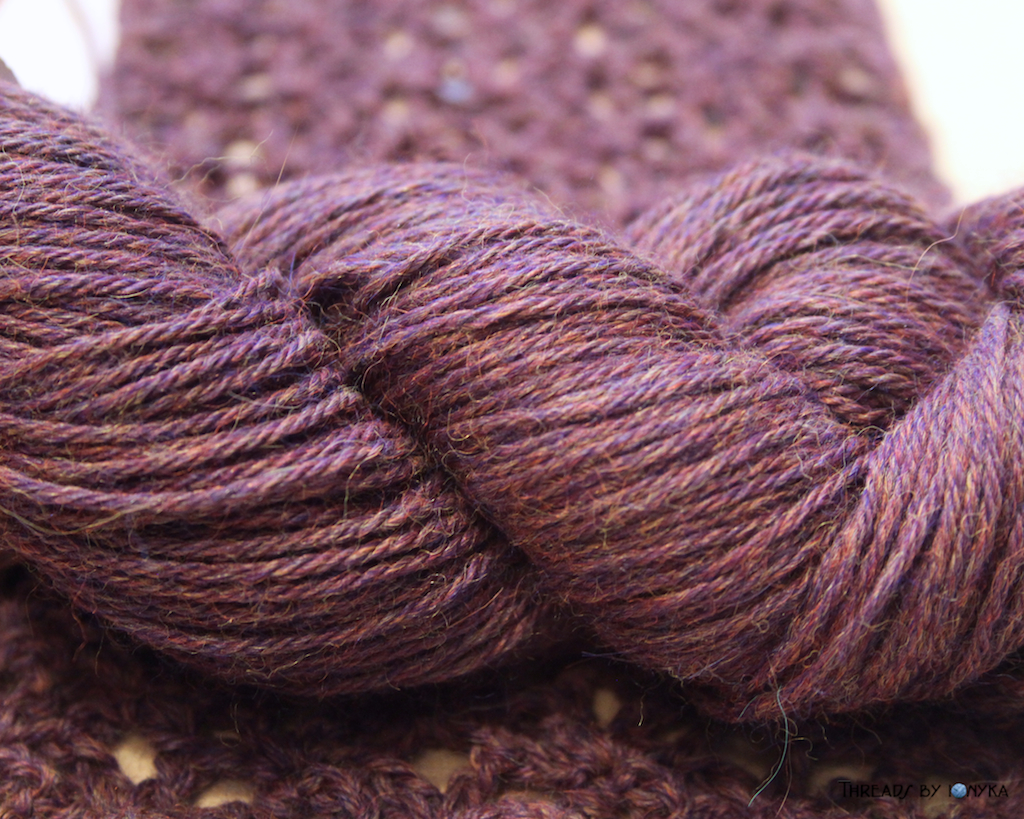
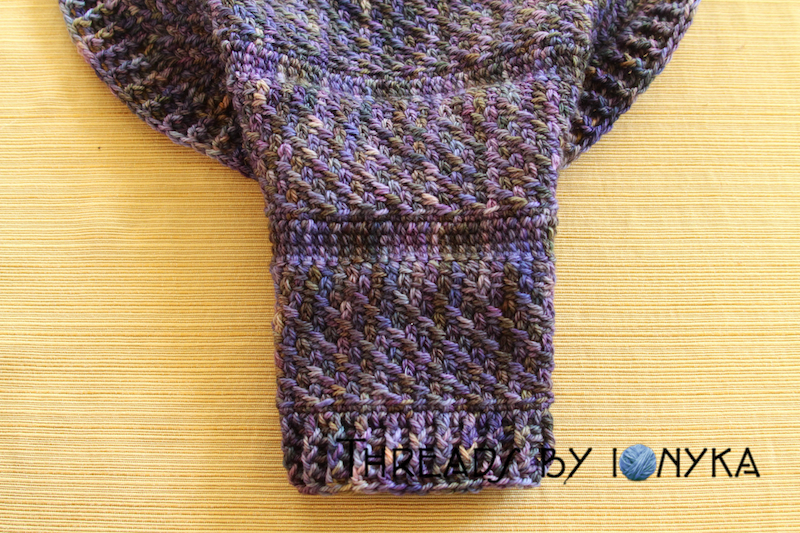
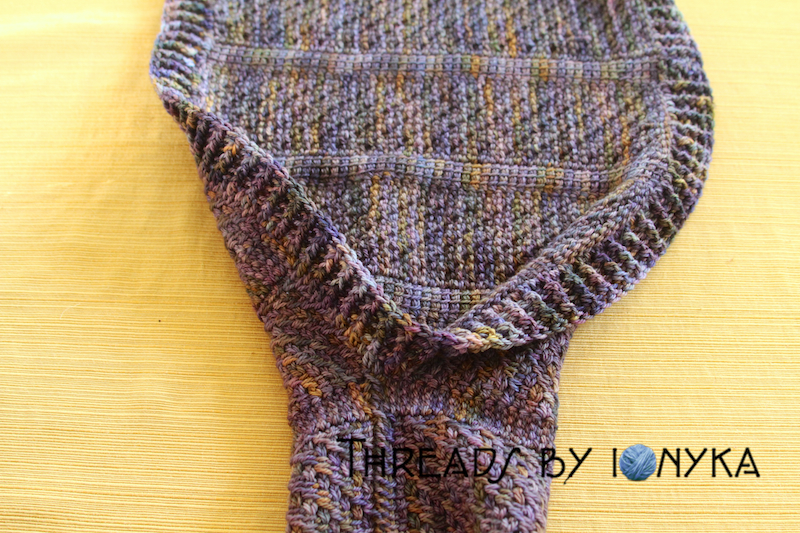
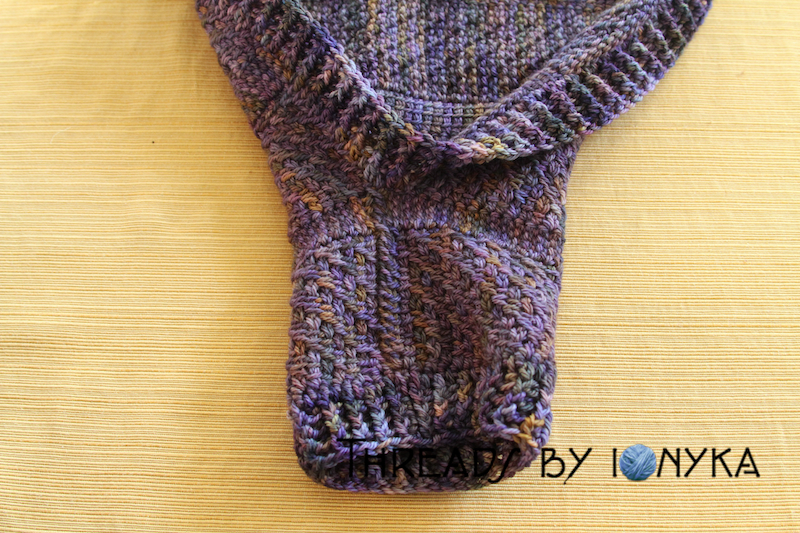
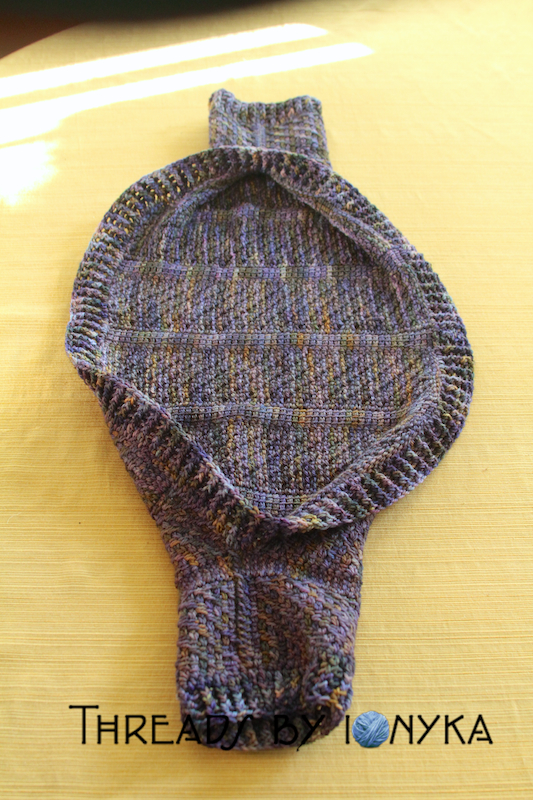
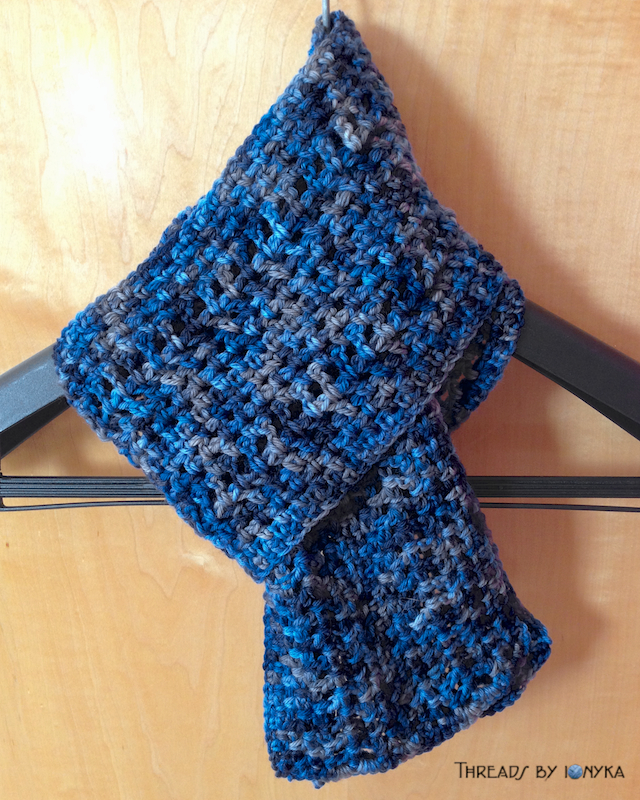
I got this yarn awhile back and could not get over how much I loved the color. It is mainly a medium heather purple color but it has specks of blue, yellow, red and orange in it. So soft too, the only yarn condition I hold higher than how much I like the color.  Although it is listed as a medium weight 4, I feel its on the thinner side of that compared to others I have that list it as a 4. I wanted to find a pattern that was not too heavy so it could be worn more of the year.

After making a bunch of things for friends lately I opted to make something with this yarn for myself, as a pat on the back for starting my shop, selling at fairs and doing much better than I ever thought possible in sales. I hope I continue to grow in this craft on and upwards as I gain more experience. So this is where I say, Go Me!

The Pattern

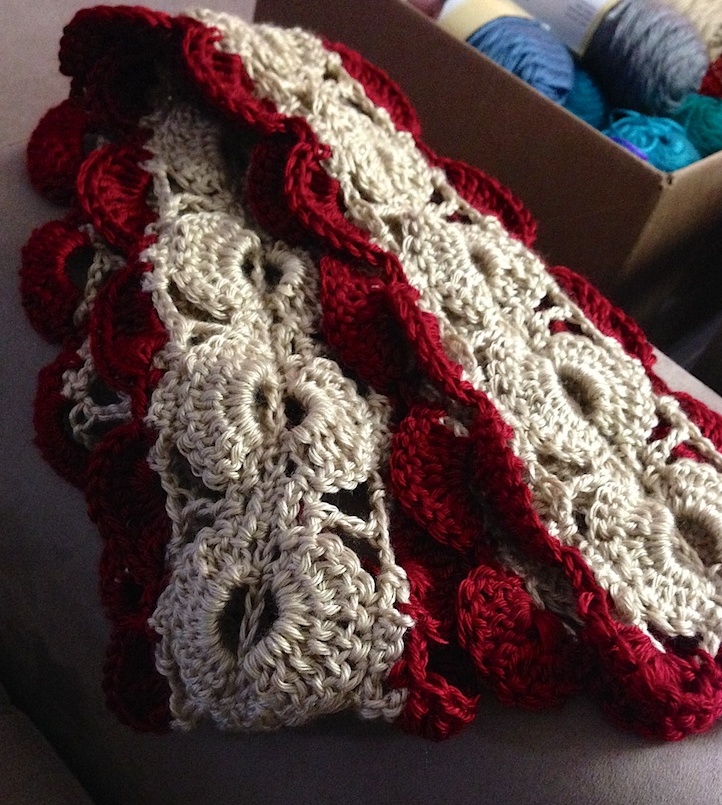
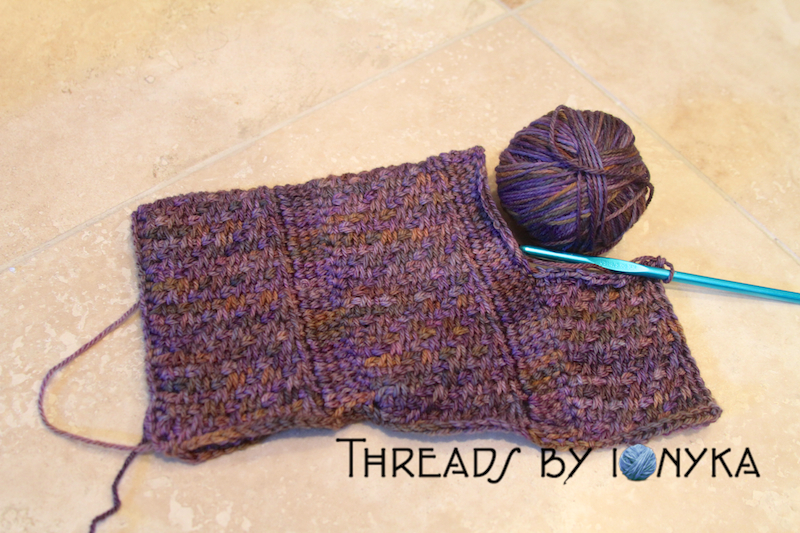
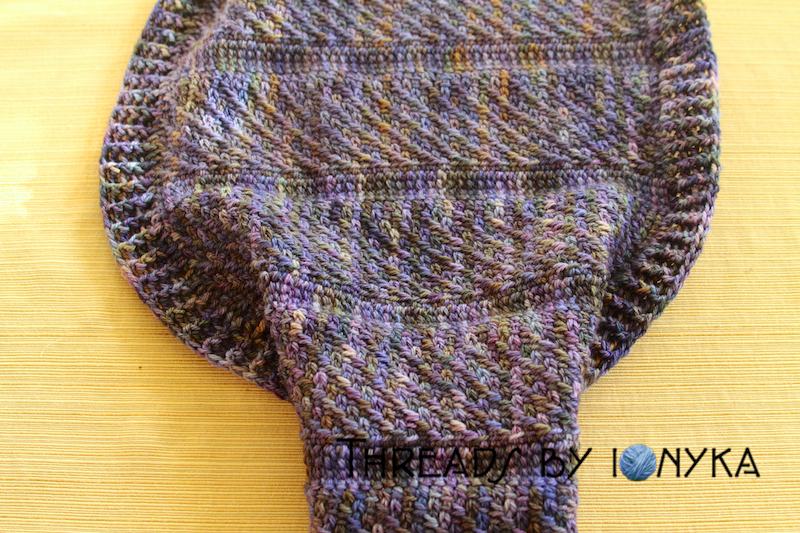
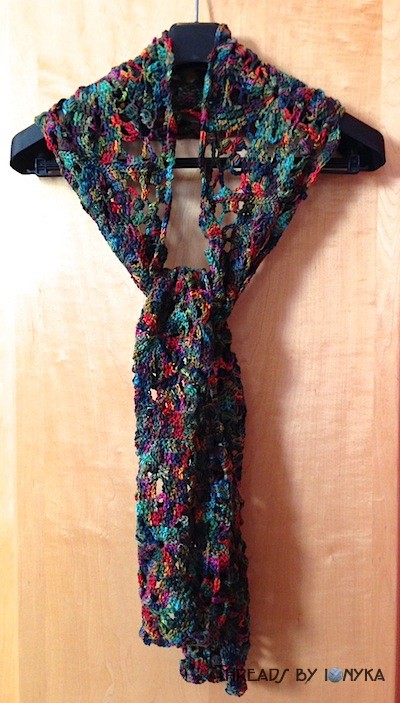
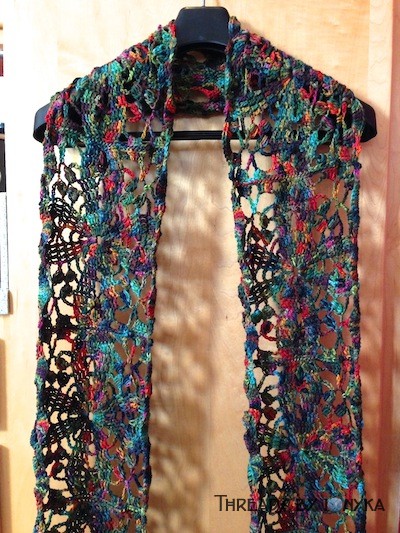
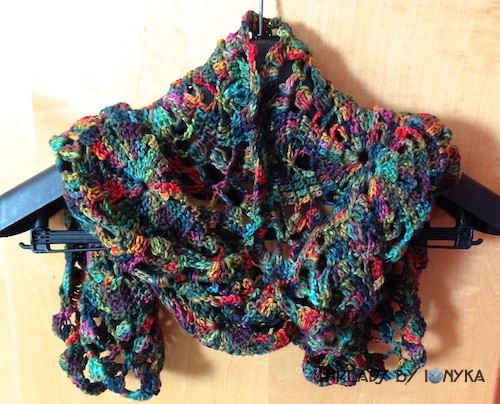
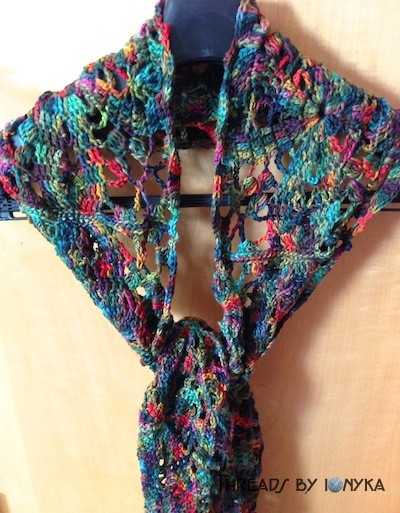
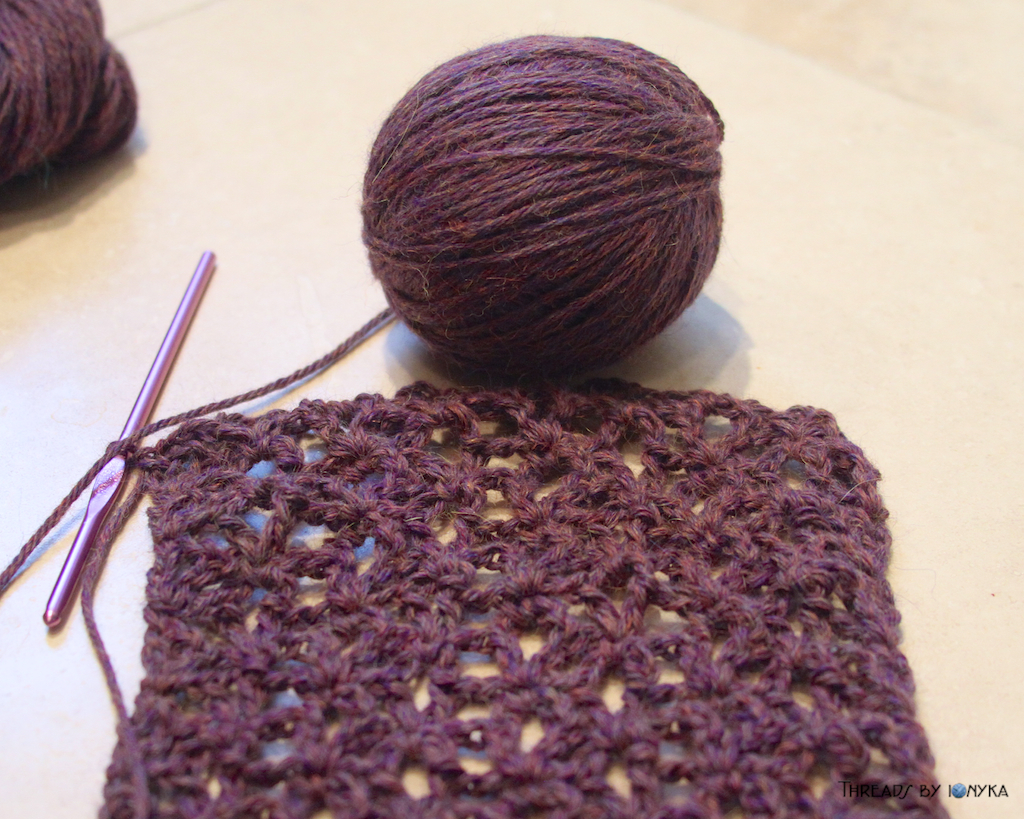
Name: Richelieu Scarf (Ravelry Link)
Author: Wolf Crochet (link to blog and written pattern)

IMG_6088

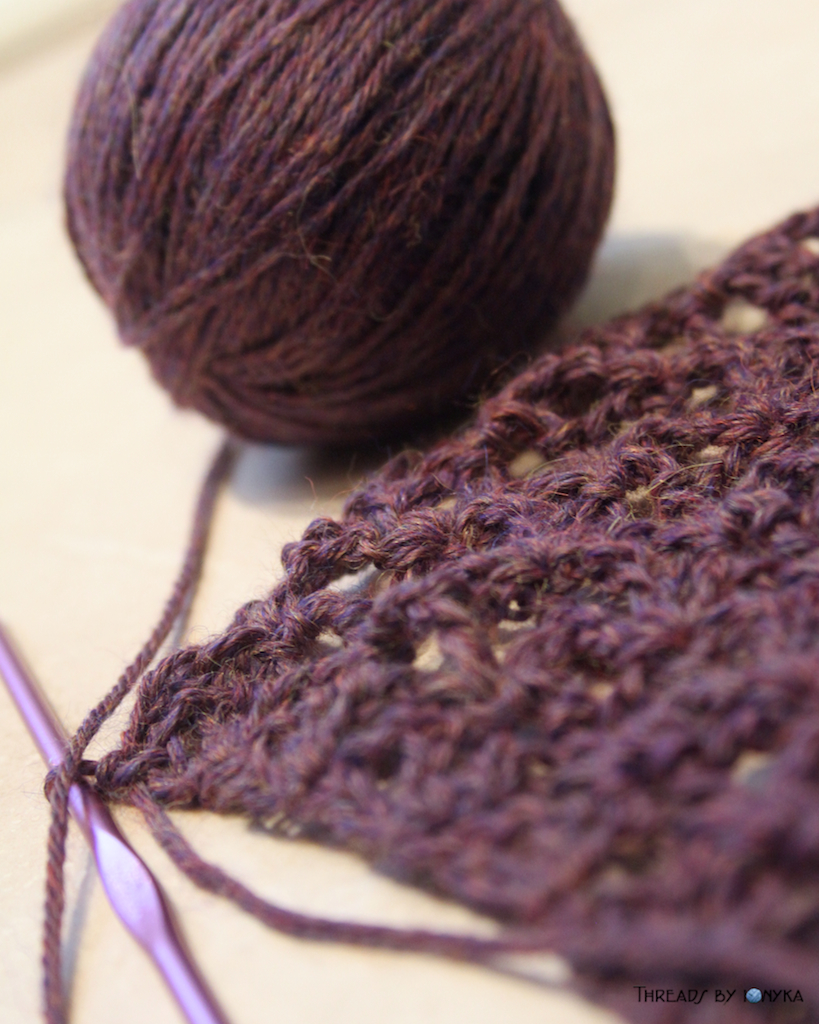
I like the pattern because its very basic, but looks intricate. It also works up really quickly, I have already finished 1 skein and have balled up and started the 2nd already so it should be done soon. I want to make it extra long and include the fringe the pattern has too. This will also be my first attempt at blocking my crochet pieces. I have yet to try this (I didn’t have an iron) but got a tiny iron that does steam and an ironing pad from Amazon recently so I will post some details about that process once I give it a go as well. Yay for more learning!

IMG_6085

IMG_6079

Thanks for stopping by!

Projects For Friends & Family

I decided to take some time this month to work on some project requests from friends and family that I have gotten over the last few weeks. So here is a collection of what I have made for them!

First up, my friend Rebecca (back in Sept!) asked for a cotton scarf for her and a hat/scarf combo for her cute 2yr old boy. They live in Atlanta so it does not get cold there much (except lately) and she does not like wool so we decided on the Lion Brand Cotton-Ease as the yarn of choice for the things I would make. She also asked for her scarf to be a striped chevron pattern. Not using any particular pattern for her scarf, I finally got the yarn in and this is my striped chevron scarf for her.

IMG_2871

It’s your standard 3 dc, dc3tog,  3dc, 3dc in 1 dc, repeat pattern and 2 rows of each color ending with purple on both sides. I really like the grape and the gray together. I used a 5.5 hook for all of the items I made from this yarn, so that made things easy too.

Onto her little kiddo, I wanted to keep a stripe theme for him too so I made a cute toddler size hat and scarf combo.

IMG_2867

The scarf was just a simple row of hdc’s and I alternated from using the back loop and front loop. Again, no special pattern used for this one either. The hat I followed the toddler size version of Sweet Stripes hat from over at moogly. So many great tutorials over there btw. I added a pom-pom to the hat cause it felt like it needed it. I followed a short and easy video on how to make them.

Since toddler size items are not as big as adult size items, I had extra yarn so I wanted to make another scarf for Rebecca using all 3 colors. I kept with the stripe theme once again and did a basic ruffle pattern like this one from Lion Brand (homespun is challenging to use for me so anyone that can make anything with it deserves a gold star from me!)

IMG_2875

They all go in the mail tomorrow so I do hope she likes them and sends me a photo of her and J in their new accessories!

Next was my Aunt who came out to see me at a recent craft fair and wanted a scarf since she and my Uncle are moving to South Korea soon! Crazy awesome adventure for them I am excited to hear about their time there and hope they fly back to visit as often as possible.

She wanted a scarf similar to this one but not a circle scarf. So since that exact yarn wasn’t available at the moment, I did have on hand that same Red Heard Boutique but in their Mosaic greens and blues color.

IMG_2878

I also used a pattern tested with this yarn by fellow blogger yarnaway  but made mine 2 clusters shorter since I only had 2 skeins and I did not want it to be that wide. The pattern and yarn go very well together and I love these colors so much I may end up doing one for myself sometime soon. I’ll be giving this to her soon before they leave.

My last current request came from my sister Val who needed a red and tan scarf to go with a new red peacoat she got recently.

I have had this scallop pattern in my favs on Ravelry for awhile so I thought I would try it for her. I used a larger hook than noted because I wanted it to be a bit more loose and slouchy. Luckily I already had the colors she wanted in stock from making a 49ers hat so I used some of my Caron Simply Soft to crochet this up quicker than I thought. I already sent it to her and she really liked it!

IMG_2831

Those are all my recent projects to kick off 2014! Now to focus on some more shop items and get ready for a vending event this Thursday!

Thanks for stopping by!

First Garment Project! A Shrug

The Yarn

Company/Store: Malabrigo Finito
Colorway: #870 Candombe
Weight/Length: Sport Weight/200 yards per skein (I have 4 skeins)
Material: 100% Superfine Merino Wool

IMG_5921

IMG_5918

 I saw this yarn at Uncommon Threads during a sale and had to get the last 4 they had, I knew I was going to make something for myself with this yarn so I kept it until I came across a neat pattern. It is soft and colorful, the colors go from soft to deep but not too much. Just lovely!

The Pattern

Name: Nuts and Spice Shrug – Ravelry Link
Author: Kim Driggs

I found this pattern while I was browsing Ravelry one night and thought it would be a perfect project for this yarn. I had enough yarn plus extra so I thought I would give my first garment a try. I had learned the basic Tunisian Simple Stitch awhile back from a YouTube video so I felt  confident I could figure this out. Here is a picture of the first arm I did.

IMG_5926

Once I got the basic pattern down it was easy going for the arms and back sections using a 2 section repeat. I was feeling pretty confident at this point, checking the size as I went to make sure it was going to fit me. It worked up pretty quick and in a few days of off and on work I completed it already! Of course it helped that it was over the holiday so I had some extra time.

Final Stats

Size: Based on the pattern I would call this Medium, I upped the initial size to the next larger size recommended because I wanted it to be a bit wider in the arms, which I am glad I did and would likely go up a size again if I made another one just so it is a bit more roomy. It fits though and will be great to use during warmer months to cover my shoulders.
Yarn Used: I used about 2.5 skeins so about 500 yards total for this shrug.

I only made 1 change to the pattern. Instead of following the instructions for the border I opted to do 4 rows of fpdc, bpdc. I tried the border a few times and it was just not looking right for some reason, the instructions were not hard to understand, I just didn’t like how mine was looking. The pattern is nicely written and easy to follow however I do recommend getting some experience with basic Tunisian crochet first before diving into this pattern, it will be easier to follow if you do.

I will get a photo of me wearing it soon too I just missed the light today to get one in before I posted this.

IMG_5944

IMG_5943

IMG_5942

IMG_5941

IMG_5940

IMG_5939

Thanks for stopping by!


Holiday Accessories: Tree Skirt

Another memorable holiday traditions at our house growing up was taking a drive out to Hozak Farm (I grew up in Pittsburgh, PA) the weekend after Thanksgiving to hunt and cut down our perfect Christmas Tree. *queue opening scene from Christmas Vacation* ok so it wasn’t totally like that, but at times it was really cold and snowy, others chilly with no snow, just depended on the year. The event included a wagon ride into the tree farm to spend what seemed like forever trying to decide as a family which type of tree we wanted and which one of that type we were going to select.

Eventually we would decide and my dad would saw it down and would get it trucked back, wrapped in twine and put on the top of the car. After that we were pretty hungry so luckily the barn there is set up for great sandwiches and soups along with hot cocoa. We would bring the tree home and put it straight into the tree stand and wrap my moms quilted tree skirt around it. I found a rather old photo but you can see the skirt in it fairly well.

IMG_0097

So again, I knew another fun holiday accessory I wanted to crochet was a new tree skirt for us to use. Since I moved out I have not always been able to have a real tree, most apartments did not allow them and I initially did not approve of fake ones. This year we may end up going the way of artificial but either way our tree will have an authentic homemade tree skirt at the very least!

I browsed a bunch of options and decided on this one called SmoothFox’s Christmas Tree Skirt. I liked it for the versatility of the stripes and the basic shape.

I used a random stripe generator I found thanks to a tip in a comment because I had 4 colors to use and wanted to mix up the colors a bit. Here is what I came up with.

IMG_5415

IMG_5414

I used 4 colors of Red Heart Super Save yarn so it can be easily washed if needed, and since I had a bunch left over from the stockings, it made sense to make them all match a little too.

IMG_5411

IMG_5406

I purposely did not make it super large yet to see how it fits with the tree we get, I can always add a few rows if I need to. Once we have a tree I will get a few pictures of it when the new skirt on. I am very pleased with how it came out, the patter was easy to follow and takes shape nicely.

Post Update: 12/21/13

We finally got our new tree up and decorated last weekend so here is a photo of the tree skirt.

When I get time, likely after the holidays, I need to add about 5 or 6 more rows to it so it is a bit wider, it barely covers the tree base right now. I did add 3 buttons to the closures so it stays closed better. I attached a chain 5 to the edge of 2 rows like a button hole and attached the button on the other side. I will get close up pictures of that once I finish adding some rows later on. I do like how it looks though!

IMG_2670

IMG_2671

Thanks for stopping by and Happy Holidays!

Holiday Accessories: Stockings

One of my favorite times during the holidays was decorating the house with snowmen (my mom had a huge collection of them), putting up the tree, and hanging our stockings on the banister of the stairs. My mom had sewn up one for each of the four of us in the family, and even 1 for  our dog and cat. Mine had my name embroidered on it with an angel. The stockings were felt and fabric sewn together with thread. Each Christmas morning my sister and I would get up and run down to grab our stockings while we ate breakfast before opening presents. Oranges, nuts and other small trinkets were always customary for stocking stuffers are our house.

When I moved away to go to college and subsequently to Atlanta, and presently California, I did not get to enjoy my stocking unless I happen to be visiting my parents for the holiday (which was not every year unfortunately). So one of my goals when I began to learn how to crochet about a year ago was to become efficient enough to make new stockings for myself and my husband, to use as a new family, and one for Chester Cat of course too!

I decided to give this pattern by Red Heart called Holly & Berry Stockings a try because I liked the cuff part because I wanted to put our names on them. I also wanted to use the Red Heart Super Saver yarn because it will always be available if/when I need to make another one.

The pattern is easy to work up and I followed it as described except for 1 part. When I was putting together the first stocking I made, I felt that after I made the cuff and was stitching it together that the cuff part was a tad too small and I did not want a seam to show at the back of the stocking where you join the sides together. So for the remaining 2 stockings I added 2 stitches to the noted 44 they put down in the pattern. This gave me enough to work with at the back so the cuff fit snug but not too tight. Just me maybe, but I liked it with the extra stitches better.

Before I put them all together I had to learn how to stitch letters into the cuff. I had not done this before so I turned to my trusty YouTube search to find a helpful video and this is the one I used:

From that video I was able to figure out the basics and started to put the letters of our names onto the cuffs, my husbands name and the cats name are both 7 letters so I started with the middle letter and worked my way out, I did not remember to take a photo of them prior to putting them together so I took some close ups of the finished ones instead to get the idea. My name is short so I put it all on one side since that seemed to make more sense. Here is a closeup of mine to see the letters stitching.

IMG_5434

I am thrilled with how they turned out, I hope to get many many years of holiday fun out of these stockings. Here are some more photos of the finished stockings below.

IMG_5430

IMG_5425

IMG_5421

Thanks for stopping by and Happy Holidays!

Cozy Throw Pillow

About a month ago, shortly after I finished my DROPS Blanket, I made a few new squares with this flower motif in them with some extra yarn I had. Link to Ravelry pattern here. After making a few I didn’t really know what I wanted to do with them so I set them aside for awhile.

IMG_2123

Fast forward to about 2 weeks ago when I was needing to get a few more $ into a Joann.com order to qualify for free shipping, I saw that they had these plain polyester pillow forms. That’s when the lightbulb went off, I can make a few more squares and turn them into a pillow! While I am certainly not the first person to do this of course, however I got excited at the possibility of a new project. The pillow forms arrived, I got 2 16×16 forms and I got to work on more squares.

Taking what I learned from the DROPS blanket, I estimated the pillow to need 9 squares for each side. I did not want to leave too big a seam between them like in the blanket so I opted to do a row of sc in the back loops only across each row (I used white to connect all the squares and then around each set of 9). I then did a row of regular sc around each set of 9 squares, putting 3 sc in each of the 4 corners. Finally to join both sides I did another round of sc all around, this gave the edge a slightly thicker look and hold.

IMG_2373

IMG_2374

I think it came out really cute, don’t you?!

Want one for yourself or a gift in your favorite colors? Now available as a Made to Order item in my shop, so head there for all the details!

Thanks so much for stopping by!

This item was featured on:
logo

Flower Potholder

I took a quick break from some other projects to try my hand at this cute tutorial by RubyRed Eclectic called Crochet Flower Pot Stand.

by RubyRed Eclectic

I have had it pinned for quite some time and yesterday I thought to give it a try. I used 3 colors of Caron Simply Soft yarn in white, grey and teal. It is a easy pattern to follow, you make both sides and then stitch them together. The hardest part for me was the slip stitching between the petals. I did alter my version by leaving out row 9, I was running short on the white yarn and wanted to make sure I had enough, and instead of 12 sts for row 10, I used just 10. Check out how mine turned out!

IMG_0445

IMG_0446

This pattern is really fun, I recommend it if you want to try something to use up some yarn and may take a day or two to make. I can see other possibilities for this pattern, downsizing it and making coasters or ornaments.

Did you try this pattern too? Share a photo or link to your blog! Thanks for stopping by!


Cloudy Skies Scarf Pattern!

Grey skies are gonna clear up, crochet a fun and easy scarf!

I am happy to announce another new and FREE pattern called Cloudy Skies. I was again inspired by yarn I got from Western Sky Knits, a neat combo of blues and greys in DK weight. You can read all about this mashup on the pattern page HERE.

This time I have included a Symbol Chart along with photos. This pattern is great for beginners and experiments alike as it is easily customizable to any size, width and finishing desired!

CloudySkies1

Cloudy Skies Scarf

For those that prefer downloadable PDFs you can use your favorite crafty site here:


Please Note: There are no restrictions on the use of my patterns however the patterns themselves are not for sale, resale or duplication. Please give credit by linking to the pattern if used, I enjoy seeing what others make with it!


#Mashup – Rainforest Squares Scarf

The Yarn

Company/Store: Misti Alpaca
Colorway: Macau CSP24
Weight/Length: DK/327 yards
Material: 83/17 Pima Cotton/Silk

rainforest1

rainforest2

I picked up 2 skeins of this yarn from Uncommon Threads recently, I am a big fan of green and was really taken by this yarn with so many colors, but they all seem to come together. I did not know the name of this yarn was Macau prior to comparing it to the rainforest when choosing a name for this scarf either! (I do seem to be featuring a lot of scarves lately I know, I will try and do a hat or something soon instead if I can…) It is super soft, as all yarn I buy has to be, and since its mostly cotton I wanted to find a pattern that was good for any season.

For those wondering, I got the idea to wind yarn onto a toilet paper roll after seeing this Pinterest photo.

The Pattern

 Name: Mirror Lake Scarf (Ravelry Link) (FaveCrafts.com also called Green Sheen Scarf)
Author: Lisa Gentry for Caron Yarns

Mirror Lake Scarf by Caron Yarns

So far I have only done 1 of the squares needed for this scarf. I do really like how it is turning out. I wanted to note that I changed my hook size to a G, instead of the I that is recommended for the pattern, I started with the I hook and it was way too loose. The G is working out great for this yarn for me. Otherwise I am following the pattern as described and will update again when completed!

rainforest3

Post Update: 10/3/2013

After a few weeks of neglecting this project I finally got into gear and completed it! I followed the pattern and made 8 squares, and then did the edging. The only change I made was on the edging where I only did 10 dc instead of the instructed 14, I wanted to ensure I had enough yarn left over at the end. I adore how it turned out!! Photos below!

Final Stats:

Size: 8in x 70in
Yarn Used: 1 full skien and about 1/2 of another, so about 450 yards total
This scarf found a home shortly after completion at a craft fair!

rainforestfinal1

rainforestfinal2

rainforestfinal4

rainforestfinal5

rainforestfinal3

Thanks for stopping by!

#Mashup – Rainbow Scarf

The Yarn:

Company/Store: Schaefer Yarn: Nicole (sadly out of business)
Colorway: Hermione; all colors of the rainbow
Weight/Length: Fingering/405 yards
Material: 80/20 Extrafine Merino Wool/Nylon

rainbowyarn

The photo does not do this yarn justice for how amazingly colorful it is. It is literally a rainbow in yarn form. I so wish I could find more but alas the company is no longer in business so I knew I had to choose wisely to find a pattern that shows off this rainbow yarn perfectly!

The Pattern:

Name: Atlee Scarf and Shawl (link to Ravelry)
Author: Bev Matheson of One Yarn After Another

Atlee Scarf and Shawl by One Yarn After Another

Atlee Scarf and Shawl by One Yarn After Another

I came across this pattern on Ravelry and instantly knew, this was the right pattern to show off the ribbons of color in this yarn. So, I know as I continue to crochet I am going to come across things I make that I have trouble parting with, however I know that I will usually have enough will power to list almost anything despite how much I like it. But I am so keeping this one for myself I can’t dream of parting with it, check out the photos of how it turned out!

rainbowscarf2

rainbowscarf3

I did not end up having enough yarn to fully complete the pattern, it came out super long, but I love how the rows lined up with the color changes just enough to really make it look like a rainbow. Needless to say I am thrilled with the result and cannot wait to show it off this winter!

Thanks for stopping by for another Mashup!